Legoweb Logo
::search

Home : Features : Tutorials : Drawing Special Effects

Drawing Special Effects Options

This short tutorial will show you how to use the Eye Dropper, Brush Tool and Stroke Palette. The program used is Macromedia Fireworks 4 and the tutorial is aimed at beginners to intermediates.

The Eye Dropper• Step 1 - Using the Eye Dropper
The Eye dropper is a very useful tool as it enables you to select a colour on the screen for you to use. It's uses are therefore numerous.

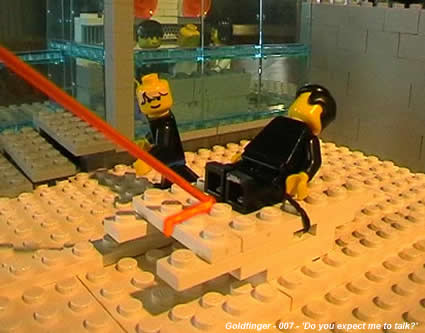
What I want to use it for is collecting the colour of the laser beam made of Lego and then drawing on a mark in the table where the beam has supposedly cut through.

To do this, I first select the Eye Dropper tool and then click on the colour that I want. This colour will appear in the Colour preview at the bottom of the tools bar.

• Step 2 - Using the Stroke Palette
The Stroke Palette belongs to the same group as the Effects and Fill Palettes.

For the effect of the Laser Beam, I used an Air Brush with a width of about 10. Make sure that the colour you select is shown in the box on the right. If not, select it with the Eye Dropper again.

Because it needs to be realistic, I didn't bother with any Texture.

Basic photograph
Stroke Palette

Brush Tool• Step 3 - Using the Brush Tool
The Brush Tool is the main tool in Fireworks which is used to draw shapes and random patterns by hand. The laser beam is built of three different colours, a backing, a 'cut' effect and the point.

The backing is just the line, and so is the same colour as the beam. The 'cut' is a little lighter, to create a varying tone and the point is almost yellow to create the impression of a burning beam.

The different colours can be found by opening the 'Colour Selector' in the Stroke Palette on the first colour and moving the select across the screen a couple of 'tones'.

Laser beam

Brush Tool• Step 4 - Applying the Techniques
Here is a second example of how to use the techniques shown above.

Have a look at the first picture - he looks quite happy for a guy about to be killed with a laser beam. Now look at the second - speechless! And finally the third - that looks more realistic.

This was a two stage effect. The first thing was to select the colour of the minifigure's skin with the Eye Dropper, and then using this to colour over his mouth.

The second part was to select the colour of his eyes and draw the mouth in with a basic Stroke Style.

These techniques are very useful, as I have just shown you, for a wide range of image related tasks.

Finally, here are the two photographs of 007 and Goldfinger in confrontation:
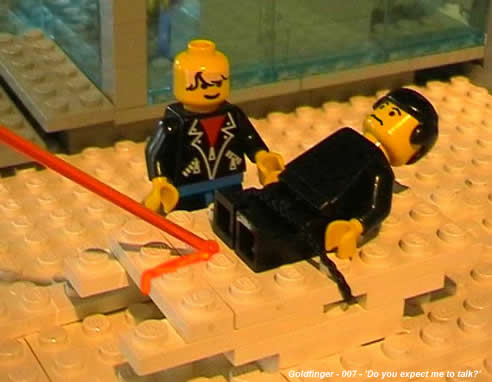
Do you expect me to talk?
'Do you expect me to talk?' [Bond]

No Mr.Bond I expect you to die!
'No Mister Bond I expect you to die!' [Goldfinger]

Smiley face
Speechless face
Sad face

All content is copyright 2000-2003 to Legoweb. Any queries should be sent by e-mail to webmaster@legoweb.co.uk.
Go to top : Models : Games : Software : Features : Bricklebury : Home